I've been having such a great time cooking, eating, drinking and blogging with you all these past few months, and I've thinking about where this will take us. You know, long term.
So I did what any blogging novice would do, I tried to register my domain name. Just in case we decide to leave the blogspot compound. Not saying that we would, but I like to have options.
And I find out somebody already did. Six days before I tried. Sad face.
Now I could have just dropped it--I mean, we're all happy here, right?--but that wouldn't have been characteristic of me at all. Instead, I began to ponder alternatives. (Brad might describe this differently, and may even use the word "obsess." Potato, patahto.)
The result is we've packed up and moved to our brand-spankin' new site, Bradleen's Kitchen. So drop by, say hello, and let's share a glass of wine.
Sunday, July 17, 2011
Monday, July 11, 2011
You Got Chocolate in My Peanut Butter!
You got peanut butter in my chocolate!
And I thank you for that.
As a kid, Reese's Peanut Butter Cups were my favorite candy. They probably would still be if I hadn't embarked on adventures in cholocate eating via Mo's Bacon Bar and pretty much anything by Chocolove. Justin's makes a terrifically adult version of my favorite childhood treat; I love the dark chocolate one in particular. (And look, ma, no high fructose corn syryp!)
Chocolate and peanut butter; peanut butter and chocolate. The richer, the better.
So when I come across something like this from joythebaker, I say "NOW YOU'RE TALKING!" (Yes, I really did shout that when I found this recipe.)
Anything chocolate and peanut butter that warrants multiple warnings about its addictiveness is, well, right up my alley.
When I told Brad I planned to make this, he turned to me said "I love you" and gave me a big kiss.
And that, my friends, is why I cook.
Double Chocolate Peanut Butter Ice Cream
As noted, this recipe is based on one posted by Joy the Baker. We only had about 1/3 cup whole milk, so I used mostly skim. The ice cream was still super rich and creamy, really more like a gelato, so I'd stick with skim milk next time.

2 1/2 cups skim milk
1 cup sugar
1/3 cup unsweetened cocoa powder (I used Valrhona)
pinch of salt
3 Tablespoons cornstarch
1/2 cup heavy cream
3/4 cup semi sweet chocolate chips (I used Ghiradelli 60% cacao)
1/2 cup smooth salted peanut butter ( I used Skippy Natural peanut butter)
In a sauce pan over medium heat, whisk together 2 cups of the milk with the sugar, cocoa powder and salt. Heat until the milk start to steam, but do not let it come to a boil.
In a small bowl, whisk together until smooth the remaining 1/2 cup of milk and the cornstarch.
Add the cornstarch mixture to the heated milk and chocolate mixture, bring to a low boil and cook until thickened. The mixture will look the consistency of loose chocolate pudding; it will continue to thicken as it cools.
Place chocolate chips in a small bowl. Place 1/2 cup of heavy cream in a tall glass measuring cup and microwave until it just begins to boil (50 seconds in my microwave); pour over the chocolate chips. Let sit for 1 minute, then stir the cream and chocolate mixture briskly until incorporated.
Stir the cream and chocolate mixture into the cooling chocolate ice cream base. Place in a bowl, covered with plastic wrap or a lid, and put in the fridge for a few hours until cool.
Once cool, follow the manufacturers instructions on the ice cream maker to churn ice cream. Once the mixture has chilled and thickened in the ice cream maker, drop 1/4 cup of the peanut butter into it by small spoonfuls with the machine running. Turn off the machine before it becomes fully incorporated, to get a ribbon of peanut butter running through the chocolate.
Transfer the ice cream into a freezer safe container and add the remaining 1/4 cup of peanut butter by dropping small spoonfuls and folding to incorporate. Cover and freeze until solid.
Friday, July 8, 2011
How Easy are They?
Tina Fey might say these kebabs are as easy as a 9-piece jigsaw puzzle. And she'd be right. (Great book, by the way, T-Fey.)
This is also one of the best recipes we've made from Cooking Light in a long time; the flavors so bright, and such a great combination of textures. I'd also file this under "perfect summer dish."
We prepared the kebabs under the broiler as the directions state, but think they would also be great on the grill.
If it's not raining. Like it was here. Sad face.

Wine
We had a 2010 Pinot Blanc from Robert Sinskey Vineyards with the kebabs.

Chicken Kebabs and Nectarine Salsa with Herbed Couscous
From the July 2001 issue of Cooking Light.
Spice Rub:
1 tablespoon brown sugar
1 tablespoon olive oil
1 tablespoon fresh lime juice
2 teaspoons chili powder
1 teaspoon bottled minced garlic
1/2 teaspoon kosher salt
1/2 teaspoon ground cumin
1/4 teaspoon freshly ground black pepper
1 1/2 pounds skinless, boneless chicken breast halves, cut into 24 (2-inch) pieces
Salsa:
1 large red onion, cut into 32 (2-inch) pieces
Cooking spray
2 cups diced nectarine (about 3)
1/2 cup diced red bell pepper
1/4 cup thinly sliced red onion
2 tablespoons fresh cilantro leaves
1 1/2 tablespoons fresh lime juice
2 teaspoons minced seeded jalapeño pepper
1/4 teaspoon kosher salt
1/2 cup diced peeled avocado
Preheat broiler or prepare grill. If using wooden skewers, be sure and soak them for about 30 minutes. Safety first, folks.
Combine spice rub ingredients and rub over chicken breast; let stand 15 minutes.
Thread 4 onion pieces and 3 chicken pieces alternately onto each of 8 (12-inch) skewers. Place skewers on broiler pan coated with cooking spray (or on the grill). Broil or grill until chicken is done, turning occasionally (about 10-12 minutes).
Combine all salsa ingredients except avocado in a bowl; gently stir in avocado.
Herbed Couscous
Prepare couscous according to package directions. Before serving, stir in a few tablespoons of herbs you like. We used chives, oregano and cilantro, and also added a little fresh lime juice to brighten the flavor.
Wednesday, July 6, 2011
Better Together
Brad and I had dinner last week at one of our favorite restaurants in Denver, TAG Raw Bar. If you go, you have to do the chef's tasting menu. The chef will ask if you have any allergies or other concerns, and if there's anything you don't like. From there, he prepares course after course of tasty surprises.
After we finished the dessert course, he brought over a few bonus treats: a creme brulee cupcake and a snickerdoodle cookie. Both were delicious, but the cupcake was amazing. A light white cake with a filling of creme brulee custard, crunchy browned sugar on top, and a single raspberry. I knew I had to make some.
Creme Brulee Cupcakes
Do you love creme brulee? How about cupcakes? Right, who doesn't? So what about a creme brulee cupcake? Two great desserts that are even better together.
The Internet abounds with creme brulee cupcake recipes; apparently, they're quite the thing. Most use a creme brulee-flavored cake, topped with a brown sugar buttercream frosting. But that's not what we had at Tag Raw Bar, so not the version rolling around in my brain. Then I found this version on Bakers Royale. It was exactly what I was looking for, except for once in my life I said "yes, but not with chocolate."
Um, yeah. These were pretty good.

Custard Filling
1 vanilla bean, split in half lengthwise
2 cups heavy cream, chilled
1/2 cup sugar
pinch of kosher salt
5 large egg yolks*, room temperature
Turbinado or raw sugar
Boiling water for the water bath
* Reserve the egg whites, as you'll need them for the cupcakes
Preheat oven to 300 degrees.
In a medium saucepan over medium heat, combine 1 cup of the cream, sugar, and salt; scrape the seeds from the vanilla bean into the mixture. Stirring occasionally, bring mixture to boil. Remove from heat, add vanilla bean pod and let steep for 15 minutes. Remove vanilla bean pod and stir in remaining cream.
Whisk egg yolks in a medium bowl; slowly whisk the cream. Strain mixture and remove solids.
Pour the custard mixture into ramekins. I used four 8 oz ramekins instead of using creme brulee dishes, so there was less surface area. Place ramekins in a roasting pan or large cake pan, and fill pan with boiling water to 2/3 of the height of the ramekins.
Bake until the custards are set; begin checking them after 30 minutes and continue baking and checking at 5 minute intervals until they are done. Mine took 50 minutes, which was probably due to a combination of the high altitude in Denver, the larger ramekins, and I had to substitute about 1/4 cup of the cream with half and half because we ran out.
When done baking, cool the ramekins on a wire rack until they reach room temperature, approximately 2 hours.

Cover each with plastic wrap and chill until you're ready to assembly the cupcakes. Be sure the plastic wrap is directly on the surface of the custard, to prevent a skin from forming.
White Cupcakes
This recipe is from Martha Stewart's Cupcakes cookbook.
3 1/4 cups unbleached cake flour
1 1/2 Tablespoons baking powder
1/4 teaspoon salt
1 Tablespoon pure vanilla extract
1 cup plus two tablespoons milk
1/2 cup plus 6 Tablespoons unsalted butter (1 3/4 sticks), room temperature
1 3/4 cups sugar
5 large egg whites, room temperature (you saved these like I told you to, right?)
Preheat oven to 350 degrees. Line muffin tins with paper baking cups (24).
Sift together flour, baking powder and salt. Stir vanilla into milk.
With an electric mixer on medium-high, cream the butter until smooth. Gradually add sugar and beat until pale and fluffy. Reduce speed to low and add flour and milk mixture, alternating and ending with the flour. Beat until just combined after each, and scrape bowl down as necessary.
In another bowl, whisk egg whites until stiff (not dry) peaks form. Gently fold the egg whites into the batter in three additions.
Divide batter among prepared muffin tins. Bake until done (cake tester inserted in center comes out clean), 18 to 20 minutes. Place tins on wire rack to cool for about 10 minutes, then take the cakes out of the tins and cool completely on wire rack.
To assemble cupcakes:
Using a sharp paring knife, cut a cone out of the center of each cupcake.

Fill each hole with custard, using the back of a spoon to spread the custard a little beyond the hole on the top of the cupcake. If not serving immediately, place prepared cupcakes on a large cookie sheet, cover with plastic wrap (again making sure the wrap is placed directly on the custard) and place in the refrigerator.
To serve, sprinkle some turbinado or raw sugar on top. Hold a small kitchen torch 5 or 6 inches from the surface of the cupcake and wave it back and forth until the sugar has browned. Sprinkle the sugar and torch the cupcakes one at a time for best results.
We had about a dozen cupcakes left over, so I made some of that brown sugar buttercream frosting and topped them with it so they'd keep fresh longer. These cupcakes are also very good, although they're really not that reminiscent of creme brulee.

Brown Sugar Buttercream Frosting
1/2 cup light brown sugar
2 egg whites
1/8 teaspoon salt
1/2 cup (1 sticks) unsalted butter, room temperature
1/2 cup powdered sugar
In a double boiler over simmering water, whisking constantly, cook brown sugar, egg whites and salt until the sugar has melted and the mixture reaches 160 degrees. Transfer to the bowl of a stand mixer and whisk on high speed until stiff (but not dry) peaks form. Continue beating until the mixture cools (about 4-5 minutes).
Add the butter 2 tablespoons at a time, beating well after each addition. Add the powdered sugar 2 tablespoons at a time, scraping down the bowl as necessary to fully incorporate. Beat for another 3-4 minutes, until it is of desired consistency and thickness.
Saturday, July 2, 2011
OK, Carb Lovers, Listen Up.
Do I have everyone's attention? Good.


1. Sift the flour and salt together into a bowl to incorporate.
2. Pour the flour/salt mixture onto a clean work surface (avoid granite as it can be too cold) and form a well in the middle. Make sure the sides are high enough to hold three eggs.
3. Break the three eggs into the well in the flour and add the olive oil in with the eggs.

4. Slowly stir the eggs with a fork to break the yolks. Continue stirring and slowly expand to incorporate flour.
5. Once the texture gets to the point where you can no longer stir with the fork, use your hands to incorporate the rest of the flour. Knead until the mixture forms a dough. The dough should not stick to your hands or the work surface. Add more flour in small increments if necessary.
6. Wrap the dough in plastic wrap and let sit 30 minutes.
7. Follow the instructions in your pasta maker to make the final pasta. Tagliatelle or Pappardella work best with the Bolognese.
* Cremini mushrooms will also work, or you can use all reconstituted dried Porcini mushrooms.
1. Place dried Porcini Mushrooms in a bowl and cover with 1 cup hot water. Cover and set aside.
2. Heat a large dutch oven over medium high heat. Add butter and olive oil.
3. Once the butter has melted, add the onion and Pancetta. Cook until the onion just starts to turn brown, stirring often to avoid burning. About 7 minutes.
4. Add the carrot, celery and garlic, and cook until softened. About 5 minutes.
5. Add the fresh and reconstituted (reserve water) Porcini mushrooms and rosemary. Stir to incorporate and cook 3 to 4 minutes.
6. Add the pork, beef and buffalo. Break apart using the back of a wood or metal spoon and cook until the meat just starts to brown, stirring to mix in with the vegetables.
7. Add the wine and water from the dried Porcini mushrooms, and stir. Boil until the wine and water has almost completely evaporated. Stir occasionally.
8. Reduce heat to medium, add the whole milk and nutmeg; boil until almost evaporated, stirring occasionally.
9. Add the tomatoes, stir and reduce heat to very low (as low as possible). Cook for 3 hours, uncovered, or until the juices from the tomatoes have nearly evaporated or it’s reached your desired consistency. Stir every 45 minutes to an hour. Avoid the temptation to stir too frequently.
10. Ladle the Bolognese on top of the pasta and add grate the Parmesan Reggiano cheese on top. Eat and enjoy!
This here is the best dang pasta Bolognese you'll ever have. Ever. The only other Bolognese I've had that even comes close was at Michael Chiarello's restaurant, Bottega, in Yountville, California. That was some great Bolognese, too. Well, it was great until I mistook the kosher salt on our table for Parmesan cheese and dumped it all over the top. Mmmm, I like me some Parmesan cheese on my pasta. And, yes, I can be an idiot. But you know what? I finished that Bolognese anyway. That's how good it was. And this one is even better.
I find this Bolognese tastes best when a hot guy spends an afternoon making it for you, so that when you walk in the door in the evening you are greeted with the delicious smells of tomato, onion, garlic and all the other goodness it contains. But I'm sure it pairs just as nicely with the satisfaction of having made it yourself. I've just never gone that route personally.
The hard training portion for each marathon culminates with a 22-mile run, and Brad always makes pasta Bolognese for me the night before that run. I'll never give up running marathons, just so he'll keep making this for me.
Pasta Bolognese
Each time Brad makes his Bolognese sauce he does something a little different. This time when he was shopping for ingredients he saw the market had fresh Porcini mushrooms, so he added some of those. He usually uses only dried Porcini mushrooms, and the results are also very good. So don't stress if you don't come across fresh Porcini mushrooms.

For those paying close attention, that is Parmesan cheese grated over the top of the pasta, not kosher salt. You'll like it better that way. Trust me.
Brad prefers to serve his Bolognese with tagliatelle pasta, which is strangely hard to find in grocery stores. Believe me, I've looked. Everywhere. So now he just makes his own pasta, which really doesn't take that long and makes the dish even better.

That's Brad, rolling out the pasta. Look how fast he is; it was impossible for me to take a picture where his cranking arm wasn't all blurry. And I'm an expert photographer with state-of-the-art camera equipment. Seriously. Um, really.
Wine
When I'm only allowing myself one glass of wine because of a high-mileage run the following morning, it has to be a good one. Robert Sinskey Vineyards makes a fantastic red blend called Point of View, or POV.

The Tasting Notes on their website say it's impossible to stop at one glass of this wine. But fortunately I have super-human stopping abilities. That and memories of high-mileage runs spent sweating out too much wine. Not fun.
There's also a groovy POV video on the homepage, in which Rob Sinskey talks about the vineyard's organic and biodynamic approach to winemaking. So drink a great wine and feel good about how it's made.
Fresh Tagliatelle Pasta
1 cup all purpose flour
1 cup Semolina flour
3 eggs
Dash of salt
1 Tbs olive oil
1 cup all purpose flour
1 cup Semolina flour
3 eggs
Dash of salt
1 Tbs olive oil
1. Sift the flour and salt together into a bowl to incorporate.
2. Pour the flour/salt mixture onto a clean work surface (avoid granite as it can be too cold) and form a well in the middle. Make sure the sides are high enough to hold three eggs.
3. Break the three eggs into the well in the flour and add the olive oil in with the eggs.

4. Slowly stir the eggs with a fork to break the yolks. Continue stirring and slowly expand to incorporate flour.
5. Once the texture gets to the point where you can no longer stir with the fork, use your hands to incorporate the rest of the flour. Knead until the mixture forms a dough. The dough should not stick to your hands or the work surface. Add more flour in small increments if necessary.
6. Wrap the dough in plastic wrap and let sit 30 minutes.
7. Follow the instructions in your pasta maker to make the final pasta. Tagliatelle or Pappardella work best with the Bolognese.
Bolognese Sauce
1 oz dried Porcini Mushrooms
4 Tbs Butter
8 Tbs Extra Virgin Olive Oil
½ cup finely diced onion
½ cup finely diced carrot
½ cup finely diced celery
4 cloves garlic, chopped
4 oz Pancetta chopped
1 cup chopped fresh Porcini Mushrooms*
2 Tbs chopped fresh rosemary
¾ lb ground pork
¾ lb ground beef
¾ lb ground buffalo
Portugese Sea Salt (Kosher salt will also work)
1 cup red wine
1 cup reserved water from soaking the dried Porcini Mushrooms
1 ½ cups whole milk
¼ tsp ground nutmeg
1 – 28 oz can of whole San Marzano tomatoes (pour into a bowl and crush with your hands)
Parmesan Reggiano cheese
* Cremini mushrooms will also work, or you can use all reconstituted dried Porcini mushrooms.
1. Place dried Porcini Mushrooms in a bowl and cover with 1 cup hot water. Cover and set aside.
2. Heat a large dutch oven over medium high heat. Add butter and olive oil.
3. Once the butter has melted, add the onion and Pancetta. Cook until the onion just starts to turn brown, stirring often to avoid burning. About 7 minutes.
4. Add the carrot, celery and garlic, and cook until softened. About 5 minutes.
5. Add the fresh and reconstituted (reserve water) Porcini mushrooms and rosemary. Stir to incorporate and cook 3 to 4 minutes.
6. Add the pork, beef and buffalo. Break apart using the back of a wood or metal spoon and cook until the meat just starts to brown, stirring to mix in with the vegetables.
7. Add the wine and water from the dried Porcini mushrooms, and stir. Boil until the wine and water has almost completely evaporated. Stir occasionally.
8. Reduce heat to medium, add the whole milk and nutmeg; boil until almost evaporated, stirring occasionally.
9. Add the tomatoes, stir and reduce heat to very low (as low as possible). Cook for 3 hours, uncovered, or until the juices from the tomatoes have nearly evaporated or it’s reached your desired consistency. Stir every 45 minutes to an hour. Avoid the temptation to stir too frequently.
10. Ladle the Bolognese on top of the pasta and add grate the Parmesan Reggiano cheese on top. Eat and enjoy!
Friday, July 1, 2011
Spring or Summer?
Spring roll or summer roll? I've seen both names used for the Vietnamese rice paper-wrapped rolls that are sometimes fried and sometimes not. Sweet dipping sauce or peanut-y? Stuffed with meat? Shrimp? Rice noodles?
Lots of options for this one.
We wanted to use shrimp, and as luck would have it Whole Foods had just gotten in some beautiful fresh shrimp. We said "yes" to peanut dipping sauce and "no" to frying and rice noodles on the inside. A few veggies, some fresh herbs, and that was it.
Very healthy. Very refreshing.
I'm calling them spring rolls. You can call them whatever you like, as long as you call me to come eat some when you make them.
Vietnamese Spring Rolls with Peanut Dipping Sauce
These are a lot easier to make than I expected. Once softened in warm water, the rice paper is pliable yet sturdy. Although it does get a bit sticky; wetting your fingers while you roll will help with that.

Wine
A light, refreshing dish meets a light, refreshing wine: the 2010 Riesling from Chateau Montelena.

Its crisp acidity complemented the spring rolls perfectly. And the glass I had before rolling them seemed to make everything go smooooothly.
So open your bottle before rolling and have some fun.
Vietnamese Spring Rolls with Peanut Dipping Sauce
The spring rolls are based on a recipe from a recipe in the April 2004 issue of Cooking Light and the dipping sauce is based on one from allrecipes.
Spring Rolls:
12 (8-inch) round sheets rice paper
3 green leaf lettuce leaves, quartered
3 cups fresh broccoli sprouts or alfalfa sprouts
36 (2-inch) julienne-cut carrot strips
36 (2-inch) julienne-cut cucumber strips
36 (2-inch) julienne-cut yellow bell pepper strips
24 medium shrimp, cooked, peeled, and halved lengthwise
36 fresh mint leaves
1/2 cup fresh cilantro leaves
To prepare spring rolls, fill large bowl with warm water. Place 1 rice paper sheet in bowl; let stand 5 seconds or just until soft. Place rice paper sheet on a flat surface (we used a dinner plate). Fill roll by layering all ingredients; we started with 4 shrimp halves on bottom so they would be visible through the wrapper once rolled. Fold sides of sheet over filling; roll up jelly-roll fashion. Gently press seam to seal. Place spring roll, seam side down, on a serving platter (cover with a damp paper towel to prevent drying). Repeat procedure with remaining rice paper, lettuce, sprouts, carrot, cucumber, bell pepper, shrimp, mint, and cilantro.
Cut each roll in half on the diagonal. Serve with dipping sauce.
Dipping Sauce:
1 1/2 cups creamy peanut butter
1/2 cup light coconut milk
3 tablespoons water (more if needed to achieve desired consistency)
3 tablespoons fresh lime juice
3 tablespoons soy sauce
1 tablespoon fish sauce
1 tablespoon Sriracha hot chili sauce
1 tablespoon grated fresh ginger root
3 cloves garlic, minced
1/4 cup chopped fresh cilantro
Combine all ingredients in a small bowl. If the sauce is thicker than you like, add water to thin. Chill until serving.
Monday, June 27, 2011
I Found My Thrill on Blueberry Hill
Or, rather, on Gore Creek Drive.
Last week I attended a conference in Vail. One day I was able to slip away and have lunch at Sweet Basil, a restaurant I'd heard much about over the years but had never visited. My meal was spectacular, but the true standout was the warm blueberry crostata with ricotta sherbert I had for dessert.
I've been thinking about it ever since.
So I did what any girl would do in a situation like this, when the memory of something so delightful lingers on and on. I baked a pie. And made ice cream.
Blueberry Pie with Vanilla Bean Ice Cream

I was once very intimidated by making pie crust, and in the days before I found Martha Stewart's pate brisee recipe I admit I occasionally used frozen or refrigerated pie crust. But this crust is so quick, easy and virtually foolproof there's no reason not to make it from scratch. Trust me.
The pate brisee and pie filling are both found in The Martha Stewart Cookbook, a 1995 compilation of recipes that had previously appeared in other of her publications. The ice cream recipe is based on the french-style vanilla ice cream recipe in The Perfect Scoop by David Lebovitz.
The directions below assume you will make both the pie and ice cream. I've labeled the ingredients and each series of steps to identify what you'll be working on, so you can skip around as applicable.
Pie Crust
2 1/2 cups all-purpose flour
1 teaspoon kosher salt
1 teaspoon sugar
1/2 pound (2 sticks) cold unsalted butter, cut into small pieces
1/4 to 1/2 cup ice water
Ice Cream
1 cup skim milk
3/4 cup sugar
2 cups heavy cream, divided
Pinch of salt
1 vanilla bean, split in half lengthwise
6 large egg yolks
3/4 teaspoon vanilla extract
Pie Filling
3 pints (about 7 1/2 cups) fresh blueberries, washed, drained and picked over
1/3 to 1/2 cup all-purpose flour
1 cup granulated sugar
1 Tablespoon unsalted butter, cut into small pieces
1 egg
1/2 cup heavy cream
1 Tablespoon turbinado sugar
Ice Cream
In a medium saucepan over medium heat, warm the milk, sugar, 1 cup of cream and the salt. Do not let it simmer or begin to boil. Remove from heat and scrape the seeds from the vanilla bean into the milk mixture and add the bean. Cover and let steep for 30 minutes.
Pie Crust
Put the flour, salt and sugar into the bowl of a food processor. Pulse a few times to combine. Add the butter and process until the mixture resembles a course meal, about 10 seconds.
Fill a one-cup glass measuring cup with ice and add water. With the machine running, add the water to the flour mixture one tablespoon at a time by trickling it down the side of the chute. Add only enough water until the dough holds together without being wet and sticky. Work quickly, and do not process the dough for more than 30 seconds.
Divide the dough in half, form each into a flat disk and wrap each half in plastic wrap. Chill for at least 1 hour.
Ice Cream
Pour the remaining 1 cup cream into a large bowl and set a mesh strainer or seive over the top. In a separate medium bowl, whisk the egg yolks. Slowly pour the warm milk mixture into the egg yolks, whisking constantly. Return the milk and egg mixture to the saucepan.
Heat the milk and egg mixture over medium heat, stirring constantly. (Do not use a metal spoon; it'll get too hot to hold.) Cook the mixture until it thickens and coats the back of the spoon. Pour through the strainer to combine with the rest of the cream. The mixture will be slightly thick and custard-like, so use your spoon to help it through the strainer. Place bowl in an ice bath and continue stirring until the custard has cooled. Place the vanilla bean in the custard, cover with plastic wrap, and chill thoroughly.
Pie Filling
Preheat oven to 400 degrees.
Place the blueberries in a large bowl and sprinkle with flour, 1 cup of sugar and the butter. (If the blueberries are small, use 1/3 cup flour; if large, use 1/2 cup.) Gently toss so the berries are completely covered, adding a little more flour if necessary.
Pie Crust
Roll out one of the chilled dough disks to make bottom crust of pie, and put in a pie plate. Combine the beaten egg and cream, and brush the entire pastry crust (edges and bottom).
Assemble Pie
Pour the blueberry mixture into the prepared pie crust. Roll out the second disk of dough and cut into desired shapes. Decoratively arrange the crust cut-outs over hte top of the fruit, covering it almost completely but allowing for some spaces for steam to escape while baking.
Brush the top with the remaining egg wash and sprinkle with the turbinado sugar. Bake until done (blueberry juices have bubbled and thickened), about 50 minutes. Cool completely on a wire rack before cutting.
Ice Cream
After putting the pie in the oven, remove the vanilla bean and freeze the custard mixture in an ice cream maker according to the manufacturer's instructions. This takes about 20-25 minutes in my Cuisinart. Transfer the ice cream to an airtight container and place in the freezer until the pie has cooled.
Friday, June 24, 2011
Opah!
This is one of my favorite sights when grocery shopping, fresh fish ready to be filleted to order. Whatever it is, I always want it.
![]()
The selection on display this particular day was Hawaiian Opah, also known as Moonfish. Opah is very rarely caught by recreational fishermen, and is primarily bycatch for commercial fisheries that target tuna and mahi mahi. It's not a fish you're likely to see regularly offered for sale in your local market, so when you see it you should buy it.
Our fillet was cut from the top loin, which is sweet and lean with a texture somewhat like Tuna. With fish this fresh, a very simple preparation is best. We grilled it with a little lemon, salt and pepper, and fresh thyme and oregano. Served with a salad and quinoa, it was a fast, healthy meal. Brad put a little chopped fresh mint in the quinoa, which was a nice touch.
This was the best fish I've had in recent memory.
Opah!

Wine
We drank a Chardonnay from Chateau Montelena. I love Montelena's philosophy: "Make the best. Period." Shouldn't that be everyone's philosophy?

I'm actually not a big fan of Chardonnay. I'm obviously not in the ABC ("anything but Chardonnay") camp, but my palate has grown weary of the heavy, overdone way too oaky Chardonnay. Bleh. But Montelena produces a lovely french-style Chardonnay, with just the right amount of oak.
I've mentioned Chateau Montelena in a previous post, when we had their Riesling. Their Riesling is also excellent, but the Chardonnay is what made them -- and the Napa valley -- famous. Try it and you'll see why.
Wednesday, June 22, 2011
I Want My Baby Back, Baby Back, Baby Back, Baby Back, Bay-bee Back Ribs
I got you to sing that, didn't I? At least in your head, if not out loud.
No idea what I'm talking about? Check out this clip from the tv show Scrubs riffin' on the old Chili's commercial, so you can sing along with the rest of us.

Smoked Baby Back Ribs
1 rack baby back ribs
Team Sweet Mama's Kansas City Rub* from Savory Spice Shop (see Sources page)
1/3 cup apple cider
2 Tablespoons bourbon
Coat ribs with rub and let sit 4 hours, wrapped in foil. Prepare smoker using applewood. Mix apple cider and bourbon and put in a spray bottle. Smoke ribs for 4 hours at 225-250 degrees. Spray each hour with apple cider and bourbon mixture.
*Ingredients as listed on bottle: Sugar, salt, paprika, hickory smoke salt, black pepper, mistard, onion, celery, ginger, allspice, cayenne and spices.
Baked Beans
4 slices bacon, chopped
1/2 yellow onion, chopped
1 cup BBQ sauce
1/3 cup brown sugar
1/3 cup molasses
2/3 cup beer (we used Fat Tire)
1/3 cup bourbon
1 teaspoon dry mustard
1 teaspoon salt
1/8 teaspoon ground cloves
1/8 teaspoon ground nutmeg
1 15 oz can black beans
1 15 oz can great northern beans
1 15 oz can red kidney beans
2 Tablespoons tomato paste
Heat a cast iron pot on the stovetop over medium-high heat. Add bacon and cook, stirring frequently, until fat is rendered. Add onion and cook, stirring, until transclucent and soft, about 5 minutes. Add beer and bourbon and cook, stirring occasionally, until mixture is reduced by half.
Add remaining ingredients and place pot in smoker or put in 300 degree oven and cook until desired thickness, about 2 hours.
Corn on the Cob
Based on a recipe from the July/August issue of Everyday Food, this is how I would modify it to pair well with the ribs and baked beans.
2 ears corn on the cob, husks and silk removed
2 Tablespoons melted butter
1/2 teaspoon minced jalapeno
2 Tablespoons fresh cilantro, chopped
Kosher salt
Fresh ground pepper
Heat grill or grill pan over medium high. Lightly oil with canola oil. Grill corn, turning occasionally, until kernels are tender and the corn is charred in spots, about 15 minutes.
Meanwhile, mix remaining ingredients together in a small bowl. After corn is cooked, remove to a platter and spread butter mixture over the cobs.
No idea what I'm talking about? Check out this clip from the tv show Scrubs riffin' on the old Chili's commercial, so you can sing along with the rest of us.
Brad got a new toy last week, a Weber smoker. Since buying it he'd been mulling over the very important decision of what to make in the smoker's inaugural run. He settled on baby back ribs; I was delighted with his choice.
Smoked Baby Back Ribs with Baked Beans and Corn on the Cob
Brad's ribs were spectacular, and his baked beans were outstanding as well. Seriously, I think there's nothing this man can't make better than any professional chef out there. (Yes, Bobby Flay, I'm looking at you. Ready for a real throwdown?)
My corn on the cob, on the other hand, was "meh." Tasty enough, but I totally missed the flavor profile of the rest of the meal.
So in the recipe below I've swapped out a few ingredients. It's what I should have done with the corn, and what I will do next time. Even though the recipe I followed didn't tell me to.
Kathleen evolves as a chef.

Wine
Brad sort of wanted beer with the ribs, and typically the one who spends all afternoon cooking gets to call the shots on beverage. But I'd been longing to try some of the PlumpJack Syrah we'd brought back from Napa.
I reminded Brad that of our group I was the only one who hadn't gotten to try it, as they were at the winery tasting it while I was running 26.2 miles down the Silverado Trail. In the rain. Into a headwind. And then I had to listen to them go on and on about how this Syrah would be so perfect with bar-b-que.
We had wine. Yes, I'm shameless.

Smoked Baby Back Ribs
1 rack baby back ribs
Team Sweet Mama's Kansas City Rub* from Savory Spice Shop (see Sources page)
1/3 cup apple cider
2 Tablespoons bourbon
Coat ribs with rub and let sit 4 hours, wrapped in foil. Prepare smoker using applewood. Mix apple cider and bourbon and put in a spray bottle. Smoke ribs for 4 hours at 225-250 degrees. Spray each hour with apple cider and bourbon mixture.
*Ingredients as listed on bottle: Sugar, salt, paprika, hickory smoke salt, black pepper, mistard, onion, celery, ginger, allspice, cayenne and spices.
Baked Beans
4 slices bacon, chopped
1/2 yellow onion, chopped
1 cup BBQ sauce
1/3 cup brown sugar
1/3 cup molasses
2/3 cup beer (we used Fat Tire)
1/3 cup bourbon
1 teaspoon dry mustard
1 teaspoon salt
1/8 teaspoon ground cloves
1/8 teaspoon ground nutmeg
1 15 oz can black beans
1 15 oz can great northern beans
1 15 oz can red kidney beans
2 Tablespoons tomato paste
Heat a cast iron pot on the stovetop over medium-high heat. Add bacon and cook, stirring frequently, until fat is rendered. Add onion and cook, stirring, until transclucent and soft, about 5 minutes. Add beer and bourbon and cook, stirring occasionally, until mixture is reduced by half.
Add remaining ingredients and place pot in smoker or put in 300 degree oven and cook until desired thickness, about 2 hours.
Corn on the Cob
Based on a recipe from the July/August issue of Everyday Food, this is how I would modify it to pair well with the ribs and baked beans.
2 ears corn on the cob, husks and silk removed
2 Tablespoons melted butter
1/2 teaspoon minced jalapeno
2 Tablespoons fresh cilantro, chopped
Kosher salt
Fresh ground pepper
Heat grill or grill pan over medium high. Lightly oil with canola oil. Grill corn, turning occasionally, until kernels are tender and the corn is charred in spots, about 15 minutes.
Meanwhile, mix remaining ingredients together in a small bowl. After corn is cooked, remove to a platter and spread butter mixture over the cobs.
Monday, June 20, 2011
Will Sit for Cookies
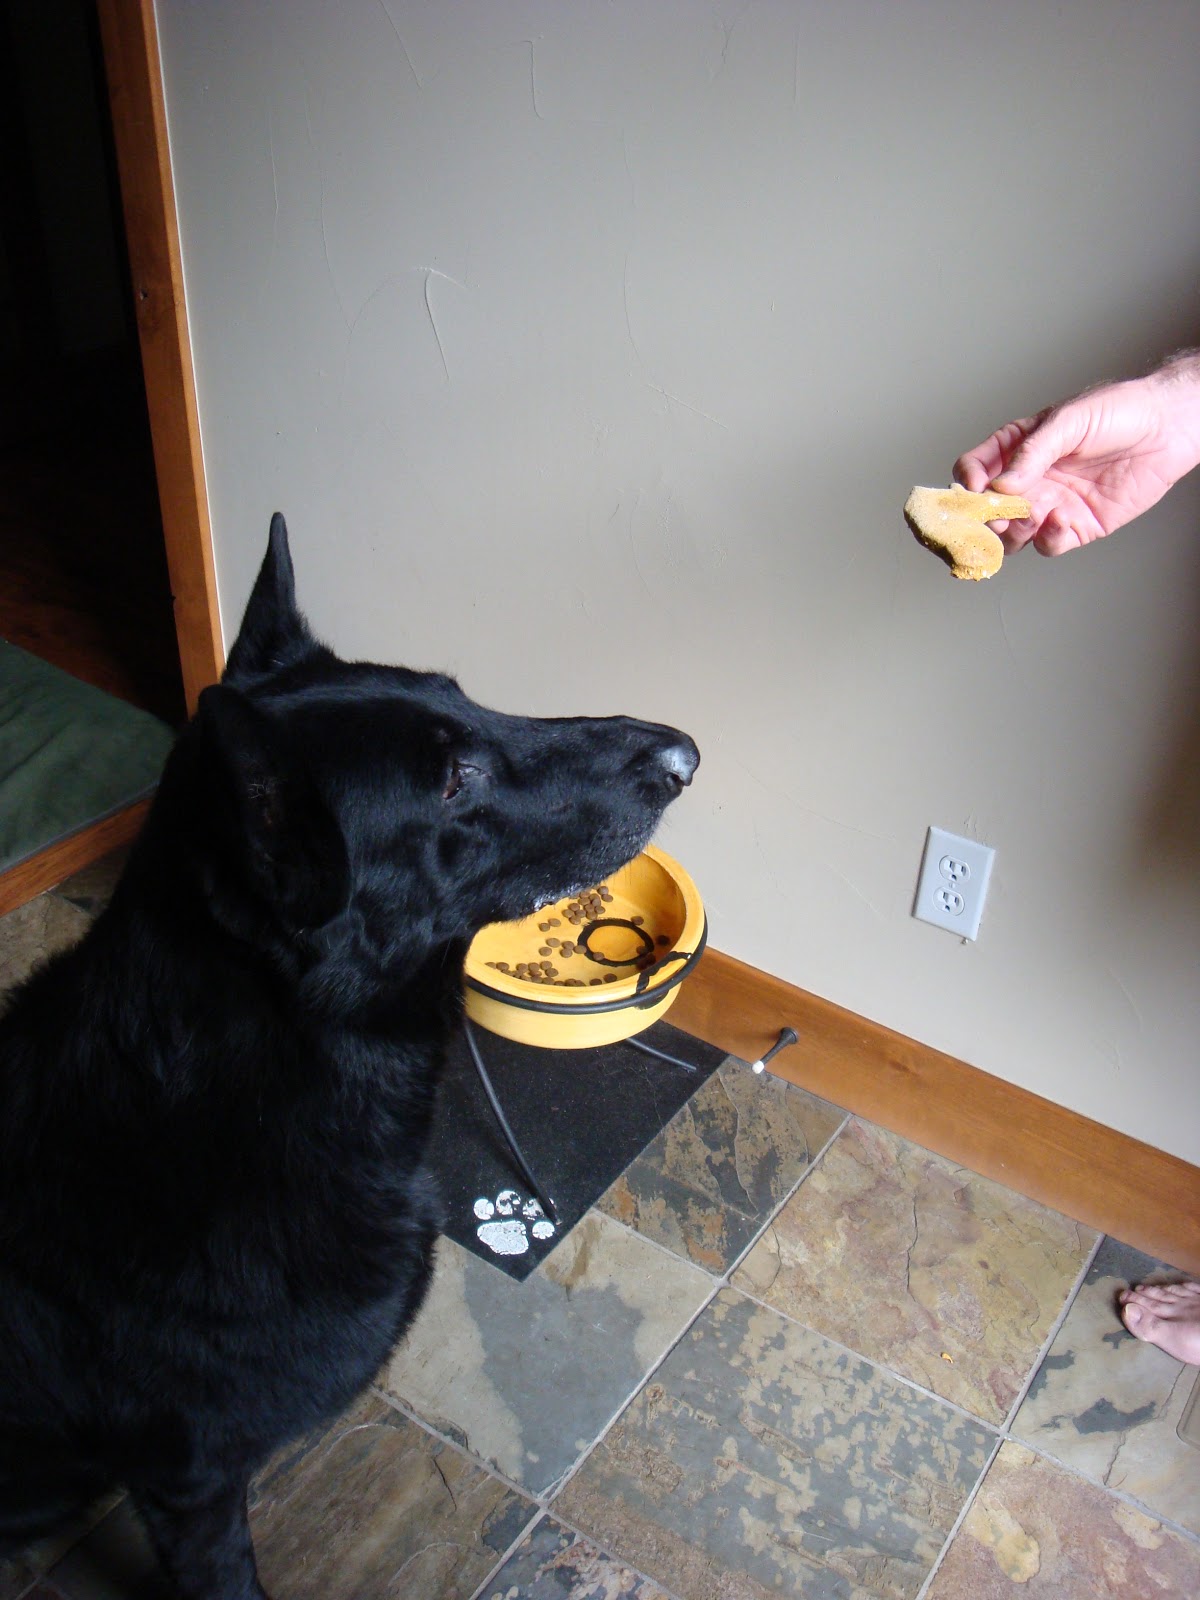
Everyone who lives in this house loves cookies, including Zorba (German Shepard) and Ruby (Rottweiler). Especially fresh from the oven.
Want your dog to think you are the best owner ever? Bake up some of these. They're not difficult, and will only take about an hour. And that includes time spent in the oven, during which time you can poke around here and read all my other blog entries.
An hour isn't that much time, considering how happy it'll make your dog, now is it? (Yes, your dog told me to say that. Feeling guilty yet?)
Peanut Butter, Pumpkin and Molasses Dog Treats

Zorba and Ruby both love treats; each other, not so much. So we had to conduct our taste testing in separate parts of the house.

 Both gave these treats two paws up. Ruby would eat from the dumpster if we let her, but Zorba has a much more discerning palate. So with her approval, I think we have a winner.
And in case you're wondering, yes, I did taste the dough. And it was good. So I guess that makes it three paws up.
Update: Zorba and Ruby's cousin Blondie also loved these treats. Blondie is known to reject many treats, so the fact that she gobbled it up says a lot. Either it tasted really good or she just liked eating a Collie-shaped cookie. I'm going with it tasted good because that reflects best on me.

Peanut Butter, Pumpkin and Molasses Dog Treats
3 cups whole wheat flour
2 eggs
1 cup canned pumpkin
3/4 cup rolled oats
3 Tablespoons peanut butter
2 Tablespoons molasses
1/2 teaspoon salt
1/2 teaspoon ground cinnamon
1 Tablespoon water (more if necessary)
Preheat oven to 350.
Put all ingredients except water in the bowl of a food processor. With the machine running, add the water through the feed tube in a slow, steady stream, until dough holds together without being wet or sticky. Test by squeezing a small amount of the dough together. If it is too crumbly, add a little bit more water; if too sticky, add a little bit more flour.
Turn dough out onto a lightly floured surface. Roll the dough 1/4 inch thick, cut into desired shapes, and place on cookie sheets.
Bake until done (lightly browned and somewhat hard), about 40 minutes.
Want your dog to think you are the best owner ever? Bake up some of these. They're not difficult, and will only take about an hour. And that includes time spent in the oven, during which time you can poke around here and read all my other blog entries.
An hour isn't that much time, considering how happy it'll make your dog, now is it? (Yes, your dog told me to say that. Feeling guilty yet?)
Peanut Butter, Pumpkin and Molasses Dog Treats

Zorba and Ruby both love treats; each other, not so much. So we had to conduct our taste testing in separate parts of the house.

And in case you're wondering, yes, I did taste the dough. And it was good. So I guess that makes it three paws up.
Update: Zorba and Ruby's cousin Blondie also loved these treats. Blondie is known to reject many treats, so the fact that she gobbled it up says a lot. Either it tasted really good or she just liked eating a Collie-shaped cookie. I'm going with it tasted good because that reflects best on me.

Peanut Butter, Pumpkin and Molasses Dog Treats
3 cups whole wheat flour
2 eggs
1 cup canned pumpkin
3/4 cup rolled oats
3 Tablespoons peanut butter
2 Tablespoons molasses
1/2 teaspoon salt
1/2 teaspoon ground cinnamon
1 Tablespoon water (more if necessary)
Preheat oven to 350.
Put all ingredients except water in the bowl of a food processor. With the machine running, add the water through the feed tube in a slow, steady stream, until dough holds together without being wet or sticky. Test by squeezing a small amount of the dough together. If it is too crumbly, add a little bit more water; if too sticky, add a little bit more flour.
Turn dough out onto a lightly floured surface. Roll the dough 1/4 inch thick, cut into desired shapes, and place on cookie sheets.
Bake until done (lightly browned and somewhat hard), about 40 minutes.
Sunday, June 19, 2011
Beef: It's What's for Dinner
My 20 mile run yesterday was hard. Really hard. I blame the heat, as it was 81 degrees by the end, but it also could've just been because some runs are like that. They start off well, as this one did, then kick your ass. When I finished I stumbled into Jamba Juice feeling like I needed something, anything, in my body. And Jamba Juice was only steps away from my car in the parking lot where my running club met.
I'd never been to Jamba Juice before. Honestly, when I think of Jamba Juice I think of US Weekly photos of Britney Spears from her fat years, wandering around with a Jamba Juice in one hand and a cigarette in the other. Barefoot. And in places where one really shouldn't be barefoot.
I was so depleted that I found it impossible to navigate the crazy large menu in Jamba Juice. Knowing they had likely served several runners from my club that morning, I asked them to make me whatever the other runners had, and put some protein in it. The result was some kind of strawberry banana concoction. It was pretty good, but I won't be running back there anytime soon. (pun totally intended. ha.)
My instinct of "put some protein in it" was apparently my body screaming out for something it needed. Like the Bruce Willis-voiced baby in Look Who's Talking, tugging on his umbilical cord for Kirstie Alley to give him some apple juice.
When Brad made it home from his equally exhausting bike ride, he told me that during his tough final miles he'd decided he wanted a big, juicy steak for dinner.
Protein? Sold!
Dry Aged Rib Eye Steaks with Grilled Asparagus, Shallots and Potatoes
With steak on the menu, what to serve with it? I found this recipe in Everyday Food for grilled shallots and potatoes. I'd never had shallots prepared like this before, but I do love shallots and this looked really good. And it was. (recipe below)

Wine
To me, no steak should ever be eaten without a nice, bold red wine. Our choice was a Cabernet Sauvignon from Andrew Geoffrey Vineyards.

The backstory on this incredible wine really deserves it's own blog post.
Brad and I were in Napa last March for me to run the Napa Valley Marathon. Our friends Robin and Mark joined us for a few days because I'd somehow managed to snag a reservation for four at the French Laundry.
My friend Robin has exquisite taste in wine, and has introduced me to many that are now some of my favorites. I learned on this Napa trip that any winery Robin visits must require at least one U-turn and cannot have any obvious signage from the road. She's an expert on hidden gems, I guess you'd say.
So one day we're out touring Napa wineries and she phones a winery whose wine she likes to ask about a tasting. Her call is answered by the owner, who tells her he'd love to give us a tasting and we should meet him at the base of Diamond Mountain. Wow, the owner? That's pretty cool.
We go to the appointed spot to wait. And wait. I'm sure we didn't actually wait that long, it just seemed like a long time because we all were like "what the heck are we doing, waiting on the side of the road for a wine tasting?" Then a white SUV pulls up and the driver instructs us to follow him. So we did.
The road quickly reduced down to one twisty lane, which we took to the top of Diamond Mountain. I know I wasn't the only one riding in our car who had serious reservations about what Robin had gotten us into. We came to the end of the road and the guy in the white SUV opens a cattle gate. We all get out of the car because clearly the rest of this journey is to be on foot.
The guy tosses Mark a box of stemware, which Mark deftly catches, and then Mark trips and rolls down the hill. I don't know how he did it, but as he was tumbling ass over teakettle Mark managed to keep the box of glasses high above his head and not a single one was broken. Hurrah!
Thank goodness for that, because it would've been hard to do a tasting without any glasses. And I now know my life would never have been complete without tasting this man's wine.
We hike the rest of the way in to the "tasting room," which is a deck built above his 13 acres of Cabernet grapes that provides sweeping views of the entire Napa valley. He has a great picture of it here, on the winery's website. It was a bit chilly up there in early March, but we were warmed by some of the best Cabernet Sauvingon I've ever had. And the company of a friendly, interesting and engaging vineyard owner.
After our tasting, we all piled back in the car for the trek back down the mountain, chatting wildly about the fantastic experience Robin had just provided us all. And Robin admits that wasn't even the winery she was thinking of when she called for a tasting. Pure happenstance led us to the best wine tasting experience any of us ever had.
Thank you, Peter.
Dry Aged Rib Eye Steaks with Grilled Asparagus, Potatoes and Shallots
Based on a recipe from the July/August 2011 issue of Everyday Food.
2 dry aged Rib Eye steaks
Rosemary sea salt (or any kind of sea salt)
Chili powder
Onion Salt
Freshly ground black pepper
1 bunch asparagus, trimmed
Extra-virgin olive oil
Kosher salt
Freshly ground black pepper
Fresh mint, chopped
1/2 pound shallots, unpeeled
3/4 pound medium-sized russet potatoes, cut into 1 1/2 inch pieces
Extra-virgin olive oil
Kosher salt
Freshly ground black pepper
Heat grill to medium-high.
For the steaks, sprinkle each with rosemary sea salt, chili powder and onion powder. Grill until desired degree of doneness, then transfer to a plate, tent with foil and let rest for about 10 minutes before serving.
Place asparagus in a medium sized rectangular pan. Drizzle olive oil over top, and stir with hands to coat the asparagus. Sprinkle with salt and pepper. Cook in a grill pan, stirring occasionally, until done (slightly charred). Just before it's done, sprinkle the mint over the asparagus.
Place shallots and potatoes on a large double layer of foil lined with parchment paper. Drizzle with olive oil and season with salt and pepper. Fold parchment and foil around the vegetables and crimp edges to form a packet. Place packet on grill and cook, flipping once, for about 30 minutes. The shallots should be soft and the potatoes cooked through and crisp around the edges.
Saturday, June 18, 2011
Pasta, Please
My training schedule for the San Francisco Marathon called for a 20 mile run this morning, so last night was pasta night. And not just any pasta, but Brad's super delicious baked rigatoni. I can (and did!) eat bowls and bowls of it.
Now Brad doesn't follow a recipe for this pasta, he just sort of whips it up on the fly. And I'm pretty sure each time he makes it it's a little bit different. But in the interest of our dear readers being able to replicate this in their very own kitchens, I annoyingly peered over his shoulder and took notes while he cooked. So, I guess I should say this is but one version of Brad's super delicious baked rigatoni. A darn good one, though.
All measurements and times are approximate. Reading that in a recipe would make me go "um, next." Hopefully I've included enough precision to adequately convey the essential components to others who are like me and, thankfully, the dish is itself pretty basic. Any mistakes in the recipe are mine.

Wine
Wine the night before a 20 mile run, you ask? Heck yeah, I say.
A good friend, and fellow marathoner, has a rule: No wine the night before speedwork or long runs. I tried it. It's not for me. She's a faster runner, so maybe there's something to it, but I'm ok with running a little slower and enjoying myself. I do restrain myself somewhat, having only one glass. Or maybe two.
We drank a wine from Montepulciano, a word I love almost as much as the wine itself. Say it with me: Montepulciano. Doesn't it sound . . . I don't know, so very Italian? There's just something about that word for me.
Anyway, ours was a Vino Nobile di Montepulciano Riserva from the Fanetti winery in Toscana-Montepulciano, Italy. It's primarily Sangiovese, blended with Canaiolo and Cabernet.
Tuscany is the heart and soul of Sangiovese and in Montepulciano, Sangiovese is known as Prunolo Gentile. The grapes are picked by hand and aged in large traditional wild chestnut oak casks called Botti for a minimum of two years (three for Riserva). Finetti ages its Vino Nobile in the oak casks five years before bottling.
Vino Nobile di Montepulciano was reportedly a favorite of Farnese Pope Paolo III, and was once considered the "king of all wines," meant only for royalty to drink.
Sounds about right for us.

Baked Rigatoni with Sausage and Mushrooms
28 oz can whole San Marzano tomatoes
1 Tablespoon extra-virgin olive oil
2 links Italian sausage (we use spicy, but sweet would also work)
4 large cloves garlic, chopped
1 1/4 c. sliced cremini mushrooms
1 fresh tomato, roughly chopped
2 sprigs fresh thyme
1/4 cup torn fresh basil
1/2 pound dry rigatoni, cooked according to package directions
1/2 an 8 oz container of ciliegine (little cherry size) fresh mozarella
1/2 cup Parmesan cheese
Preheat oven to 425.
With your hands, break up canned tomatoes in a medium bowl. Add chopped fresh tomatoes and set aside.
Begin water boiling for the rigatoni; you'll cook the rigatoni until just under al dente, a few minutes less than indicated on the package.
Heat a large saute pan with a tight-fitting lid over medium heat; add olive oil and swirl to coat pan. Remove sausage from casings and brown in pan, stirring often to crumble. Add mushrooms and thyme, and cook until mushrooms have softened. Remove sausage mixture from the pan and set aside.
Add garlic to the pan used to cook the sausage mixture and cook until fragrant, about 30 seconds. Add tomatoes, bring to boil; reduce heat and simmer approximately 5 minutes. Add basil and simmer for about 5 minutes; add sausage mixture back to pan and continue to simmer until rigatoni is done.
Drain pasta and put in a casserole or au gratin pan. Spoon sauce over the top, then stir to combine. Sprinkle grated Parmesan on top, and then scatter fresh mozarella balls on top of that.
Bake, uncovered, until done (cheese has melted and browned), about 15-20 minutes.
Friday, June 17, 2011
Joy to the Fishes in the Deep Blue Sea
Joy to you and me.
Brad and I eat a lot of fish, particularly in the summer. When at the market, I typically look for whatever fish is fresh (not previously frozen) and wild caught (not farmed). Armed with my copy of Everyday Food in my purse, I selected Chilean sea bass, chose a recipe, then went off to find the other ingredients.
I try to be aware of sustainability issues, but have to admit I generally rely on signage posted in the fish case at Whole Foods. And the fact that I'm in Whole Foods, which isn't supposed to carry fish that's not sustainable. But before writing today's blog entry, I decided to find out more about the fish we had for dinner last night.
My first stop was the Monterey Bay Aquarium website, home of Seafood Watch and the recognized authority on seafood sustainability. To my surprise, Chilean sea bass is listed as "avoid."
Uh-oh.
Researching further, I discovered an interesting backstory on Chilean sea bass.
Now, all this happened in the not-too-distant past, which made me wonder how I missed it. Maybe I'm the only one who remained oblivious to the perils facing Chilean sea bass. But in case you missed it, too, here it is.
If you've had Chilean sea bass, you know what an incredibly delicious fish it is, with its silky, large-flake flesh. People love it. And in the 1990's, people apparently loved it a little too much, quickly making it overfished and endangered. So a group of about 1,000 chefs vowed to "Take a Pass on Chilean Sea Bass," a campaign that helped bring to light the issues regarding this beloved fish, and pulled it from their restaurant menus.
In 1999, Whole Foods Market stopped selling Chilean sea bass altogether. Then in 2006 it found a sustainable South Georgia Island fishery that was certified by the Marine Stewardship Council ("MSC"), and brought it back to stores.
One of the problems is most Chilean sea bass is caught using bottom longlines, which hook and drown thousands of sea birds each year. Another issue is Chilean sea bass is a very slow-growing species that takes nine or ten years to reach reproductive maturity, and can live 40 years. This makes it extremely vulnerable to overfishing.
MSC-certified Chilean sea bass fisheries don't use bottom longlines, and they fish in a territory where the Council has determined there is a healthy population of the fish. And according to their recertification (for October 2009 through October 2013), these MSC-certified fisheries are doing very well at maintaining the population and minimizing ecological impacts, achieving scores significantly higher than in the original certification.
However, only about 5% of Chilean sea bass sold worldwide is from MSC-certified fisheries, and it is still considered to be overfished outside the territory of the certified fisheries. Illegal and unreported fishing magnifies the problem, as pirate fisherman try to cash in on the high demand of this sought-after fish.
So, as my Public Service Announcement today, please always look for the MSC certification before buying Chilean sea bass. If certified sustainable Chilean sea bass is not available, there are several good alternatives: Striped bass, Pacific halibut and sablefish (black cod) from Alaska and British Columbia are listed in Seafood Watch as "best choices" and mahi mahi as a "good alternative".
Chilean Sea Bass with Tomatoes and Fennel
This is another recipe inspired by one in Everyday Food, the July/August 2011 issue. If you've made it this far, you've probably read enough, so I'll dispense with further chit-chat and get right down to it.
This was yummy. Recipe below.

Wine
Back to Rioja we went for this fish, with a white wine from R. Lopez de Heredia. Specifically, the Vina Gravonia. This wine is aged in barrels for four years before bottling, which is much longer than is typical for white wines. As you can see from the picture, we drank a 2000, and it was awesome. Over time the wine becomes very silky; almost sauternes-like, but without the sweetness.

Chilean Sea Bass with Tomatoes and Fennel
1 Tablespoon extra-virgin olive oil, plus more for drizzling
1 small fennel bulb, thinly sliced lengthwise (save fronds)
Kosher salt
Freshly ground black pepper
1 garlic clove, minced
2 large tomatoes, diced large
3/4 pound Chilean sea bass, cut into two portions
Heat a large skillet with a tight-fitting lid over medium; add olive oil and swirl to coat bottom of pan. Add fennel and cook, stirring frequently, until translucent, about 4 minutes. Season with salt and pepper.
Add tomatoes to the pan with the fennel and cook, stirring frequently, until the tomatoes soften and release their juices, 3 to 4 minutes. Nestle halibut in the tomato mixture and season again with salt and pepper. Cover and cook until the fillets are done (opaque throughout), about 8 minutes.
Serve fish and tomato mixture in a shallow bowl over couscous or quinoa. Sprinkle with reserved fennel fronds.
Tuesday, June 14, 2011
Finding Balance
If you're like me and ate a little too much cake these past few days, this healthy meal may be just the ticket to get you back on track. Or eat this healthy meal to justify having another slice of cake. You know you want one. And, after all, isn't life about finding balance?
Cucumber and Mango Salad with Chili-Spiced Pork
This recipe comes from the June 2011 issue of Everyday Food, a Martha Stewart magazine.
I love this little magazine, which slips easily into my purse and so can be available when making game-time decisions on what to make for dinner. Most of the recipes in it are healthy, and they're all quick and easy to make.

Wine
We love Pinot with pork, and the Robert Sinskey Vineyards Los Carneros Pinot Noir was perfect. As I've written before, Robert Sinskey is one of my favorite Napa wineries. You gotta love a guy who produces a fantastic Pinot in the middle of Cab country.

Cucumber and Mango Salad with Chili-Spiced Pork
If you prefer, you can use chicken or turkey breast in place of the pork.
2 boneless pork loin chops
Kosher salt
Freshly ground black pepper
2 Tablespoons extra-virgin olive oil
1 1/2 teaspoons chili powder
4 teaspoons honey
2 Tablespoons fresh lime juice
1 Champagne mango, pitted, peeled and cut into 1-inch pieces
1/2 English cucumber, cut into 1-inch pieces
1 small head romaine lettuce, roughly chopped
Rinse and pat pork dry; season to taste with salt, pepper and 1 teaspoon chili powder. Grill until done (browned and pork is cooked through), turning once, about 10 minutes. Transfer to plate, cover loosely with foil and let rest while preparing the salad.
In a large bowl, whisk together olive oil, 1/2 teaspoon chili powder, honey, and lime juice. Season to taste with salt and pepper. Add mango, cucumber and lettuce and toss to combine.
Monday, June 13, 2011
Party Like It's 1898
From the moment I saw the Lane Cake in this month's issue of Saveur magazine, I knew I had to make it. The cake is steeped in both history and a fair amount of bourbon, and I was intrigued.
According to the article that accompanied the recipe, this cake won first prize at the Columbus, Georgia county fair and the recipe was thereafter published by its creator Emma Rylander Lane in her self-published cookbook Good Things to Eat in 1898. It also made a cameo appearance in one of my all-time favorite books, To Kill a Mockingbird. Go here for the full article by Nick Malgieri.


Between the cake, filling and icing, you'll use a dozen eggs, a lot of butter, and even more sugar. This cake is some serious good eating, from a time before we all started worrying about heart-smart this and saturated fat that.
This cake will make you fat. Sorry about that.
But I think you should just throw caution to the wind and party like it's 1898. After all, you only live once. And you can always eat salad tomorrow.
Lane Cake
Recipe from the June/July 2011 issue of Saveur magazine, which was based on Emma Rylander Lane's recipe in Some Good Things to Eat, self-published in 1898.
Thomas Keller has written the mistake many home chefs make is they prepare a recipe one time and then move on to something else. His point is the first time through you are only introduced to the recipe, but it requires repetition to master it. Like the first pancake theory.
The next time I make this cake (oh, yes, definitely a next time for this one) I will be able to better discern instructions like "cook until the mixture thickens to the consistency of loose pudding." You KNOW that line threw me, and I cooked the filling too long. My filling was more like German chocolate cake topping. Delicious, sure, but not what was supposed to be on the inside of this cake.
The recipe noted this cake tastes better after it sits a day or two and the flavors are able to meld. I tested this theory by having some at breakfast today, and it was indeed even better than last night when it was freshly baked. I should probably have some tomorrow, too, in the spirit of accurate blogging, to see if "day or two" is, in fact, correct.
According to the article that accompanied the recipe, this cake won first prize at the Columbus, Georgia county fair and the recipe was thereafter published by its creator Emma Rylander Lane in her self-published cookbook Good Things to Eat in 1898. It also made a cameo appearance in one of my all-time favorite books, To Kill a Mockingbird. Go here for the full article by Nick Malgieri.

The cake is a rich vanilla with a filling of bourbon soaked pecans, raisins and coconut, all topped off with a marshmallow-y icing.
Yum.

Between the cake, filling and icing, you'll use a dozen eggs, a lot of butter, and even more sugar. This cake is some serious good eating, from a time before we all started worrying about heart-smart this and saturated fat that.
This cake will make you fat. Sorry about that.
But I think you should just throw caution to the wind and party like it's 1898. After all, you only live once. And you can always eat salad tomorrow.
Lane Cake
Recipe from the June/July 2011 issue of Saveur magazine, which was based on Emma Rylander Lane's recipe in Some Good Things to Eat, self-published in 1898.
Thomas Keller has written the mistake many home chefs make is they prepare a recipe one time and then move on to something else. His point is the first time through you are only introduced to the recipe, but it requires repetition to master it. Like the first pancake theory.
The next time I make this cake (oh, yes, definitely a next time for this one) I will be able to better discern instructions like "cook until the mixture thickens to the consistency of loose pudding." You KNOW that line threw me, and I cooked the filling too long. My filling was more like German chocolate cake topping. Delicious, sure, but not what was supposed to be on the inside of this cake.
The recipe noted this cake tastes better after it sits a day or two and the flavors are able to meld. I tested this theory by having some at breakfast today, and it was indeed even better than last night when it was freshly baked. I should probably have some tomorrow, too, in the spirit of accurate blogging, to see if "day or two" is, in fact, correct.
FOR THE CAKE:
16 tbsp. unsalted butter, plus more for greasing pans (or use Pam for Baking)
16 tbsp. unsalted butter, plus more for greasing pans (or use Pam for Baking)
3½ cups cake flour
4 tsp. baking powder
½ tsp. kosher salt
2 cups sugar
1 tsp. vanilla extract
1 cup milk
½ tsp. cream of tartar
8 egg whites
FOR THE FILLING:
1 cup sugar
8 egg yolks
½ cup bourbon or brandy
8 tbsp. unsalted butter, cubed
1 cup raisins
1 cup chopped pecans
1 cup grated coconut
1 tsp. vanilla extract
FOR THE ICING:
1½ cups sugar
2 tbsp. light corn syrup
¼ tsp. kosher salt
4 egg whites
1. Make the cake: Heat oven to 350°. Grease and flour two 3″-deep 9″ cake pans; set aside. Note: I use Pam for Baking, which works great and is a LOT less messy.
Sift together flour, baking powder, and salt in a medium bowl; set aside. In the bowl of a stand mixer fitted with a paddle, beat butter, 1⅔ cups sugar, and vanilla on medium-high speed until pale and fluffy. Alternately add the flour mixture and milk in 3 batches until just combined, to make a batter. In a large bowl, whisk together cream of tartar and egg whites until soft peaks form; slowly add remaining sugar and continue whisking until stiff peaks form. Add to cake batter and fold until combined.
Divide batter between prepared cake pans and smooth tops; bake until done (golden brown and a toothpick inserted in the middle of the cakes comes out clean) about 40 minutes. Let cool for 30 minutes, unmold, and cool completely on a wire rack. Using a long, serrated knife, halve both cakes horizontally to create 4 layers in all; set aside.
2. Make the filling: Whisk together sugar and yolks in a 4-qt. saucepan; whisk in bourbon and butter, and heat over medium heat. Bring to a simmer, whisking constantly, and cook until mixture thickens to the consistency of loose pudding, about 2 minutes. Remove from heat; let cool completely. Stir in raisins, pecans, coconut, and vanilla; set aside.
3. Make the icing: Combine the sugar, corn syrup, salt, and egg whites in the bowl of a stand mixer; place the bowl over a saucepan of simmering water so that the bottom of the bowl does not touch the water. Cook, whisking often, until the sugar dissolves and an instant-read thermometer inserted into the egg whites reads 140°. Place the bowl on the stand mixer fitted with a whisk, and whisk the mixture on medium-high until tripled in volume and stiff peaks form. While the icing whips, place 1 cake layer on a cake stand and top with ⅓ filling; repeat with remaining cake layers and filling, leaving top layer uncovered. When icing is ready, spread it over the top and sides of the cake until the cake is evenly covered, creating swirls, if you like. Chill before serving.
Subscribe to:
Posts (Atom)